Many individuals, including myself, utilize Dropbox as a cloud file storage solution for backing up family photos, important documents, and similar items.
In addition to file storage, Dropbox’s paid service offers extra features such as eSignature. However, I have only used the cloud storage functionality, and for this reason, this article will focus solely on that aspect.
Selecting a European alternative to Dropbox
With the assistance of European Alternatives, I selected a few services to evaluate.
The first was Filen, a German file hosting provider offering a very cost-effective alternative compared to other services, as well as a free plan for trial purposes.
The second alternative to evaluate was Jottacloud, a Norwegian file storage provider powered by renewable energy and boasting partnerships with MediaMarkt and Telia.
| Dropbox Basic | Filen Starter Free | Jottacloud Free | Dropbox Plus | Filen Pro III | JottacloudHome 1 TB | |
| Price per month | 0€ | 0€ | 0€ | 12€ | 9€ | 7€ |
| Storage | 2 GB | 10 GB | 5 GB | 2 TB | 2 TB | 1 TB |
| Users | 1 | 1 | 1 | 1 | 1 | 5 |
| App for iPhone | Yes | Yes | Yes | Yes | Yes | Yes |
| App for Android | Yes | Yes | Yes | Yes | Yes | Yes |
| 2FA | Yes | Yes | Yes | Yes | Yes | Yes |
Both Filen and Jottacloud offer excellent iPhone applications, along with user-friendly browser-based admin interfaces that are comparable to what Dropbox provides.
After evaluating both alternatives for approximately a week, including the setup of two factor authentication (2FA), I ultimately chose Jottacloud as the superior option. It met all of my relatively straightforward requirements and was more affordable than Dropbox.
Additionally, it automatically includes a family plan, allowing my partner to use it as well.
Migrating from Dropbox to Jottacloud
The process was quite straightforward, though more manual than anticipated. My initial approach was to search for a tool to facilitate the transfer from one cloud file storage to another. I even considered creating a tool myself.
Ultimately, I simply downloaded all the data from Dropbox to my laptop and then uploaded it to Jottacloud. Although the process felt somewhat slow and tedious, it provided an opportunity to clean up and organize some photo albums along the way.
The simple process is described in 4 steps, here migrating to Jottacloud, but a similar process could be applied to nearly any cloud file hosting provider.
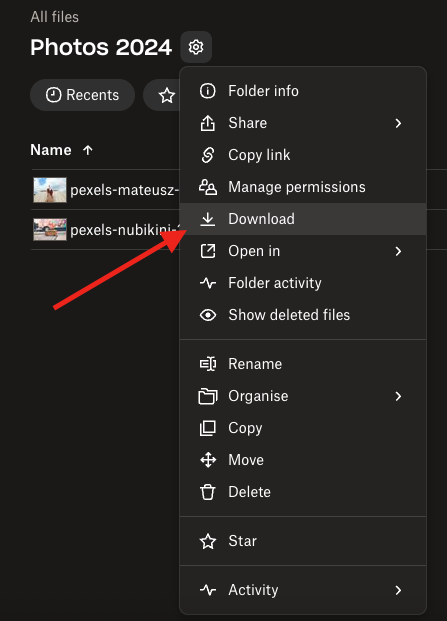
Step 1: Download from Dropbox.
Log into Dropbox and navigate to the folder you want to migrate. That can be any folder in the folder hierarchy. Click the cog next to the folder name and click ‘Download’.
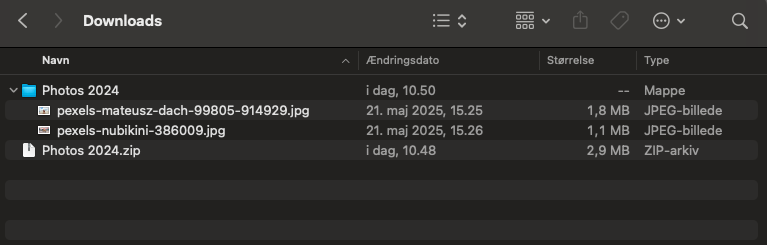
Step 2: Unzip and clean up
The next step is to unzip everything on your local hard drive. This step is also a good time to clean up and remove any files or folders that you do want to bring
Step 3: Upload to Jottacloud
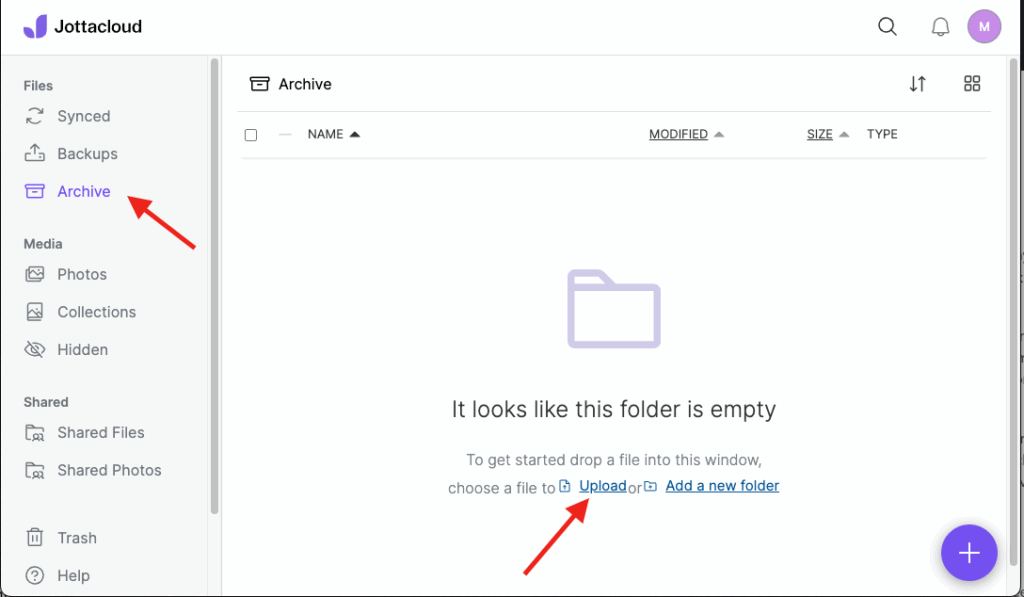
Log into Jottacloud and open ‘Archive’. This is where we will upload the folder structure just downloaded from Dropbox. To upload, click the ‘Upload’ link and select the folder you want to upload or simply drag the folder into the browser window and then wait till all files have been uploaded.
Step 4: Delete files locally and in Dropbox
When all files have been correctly uploaded to Jottacloud remember to delete the files locally on your computer and in Dropbox.
Finally if you have decided not to keep your Dropbox account, delete it once you are absolutely sure you have all your files copied.
Keeping your files secure: Enabling two factor authentication (2FA).
This is strictly speaking not part of the migration, but as keeping your pictures and files secure should be important to you no matter what you is in them here is an explanation on how to set up 2FA in Jottacloud.
In general you should avoid using one password on all services you are using, and you should always enable two factor authentication (2FA) or its slightly broader friend Multifactor Authentication (MFA).
The extra added layer of security with 2FA is usually the combination of something you, and only you, know – the password, with something you have like an application on your phone or a token.
For private users username and password combined with an authenticator application is the most normal method for 2FA.
Step 1: Download an authenticator app
For 2FA to work you need to download an authenticator app that you can use to prove that you are you when logging in.
I recommend FreeOTP which is available in Apples App Store and Google Play.
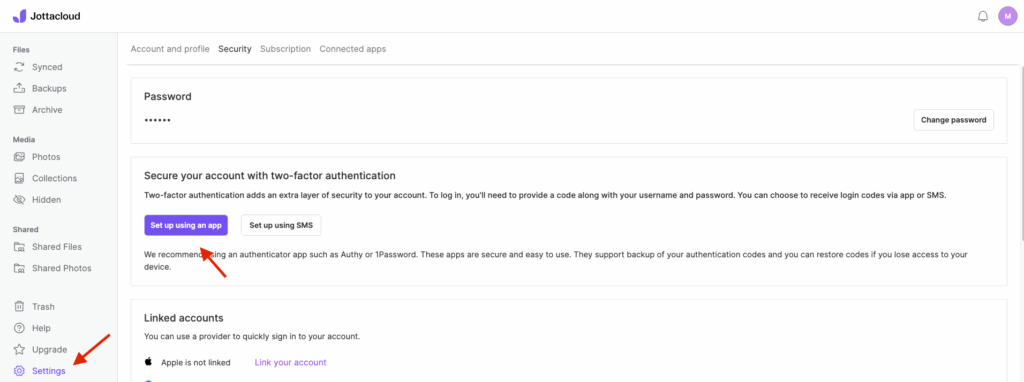
Step 2: Enable 2FA in the interface
With the authenticator app installed, open a browser and log in to Jottacloud. To enable 2FA navigate to ‘Settings’ and click ‘Set up using an app’ which is also the recommended alternative.
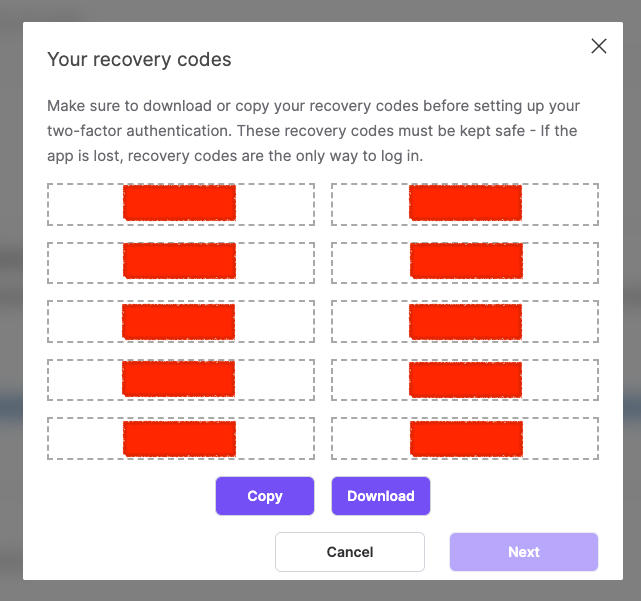
Step 3: Download recovery codes
Recovery codes is a way to make sure you still have access even if you loose your phone with the authenticator app. Download these and keep them in a safe place. You can even print them.
Step 4: Add Jottacloud to your authenticator app
When presented with the next screen, open your authenticator app on your phone. Next you need to scan the QR code. If you are using FreeOTP then click the QR code icon (next to the +) and point the camera to the QR code on your screen. Once the QR code is read assign the app an icon an click next.
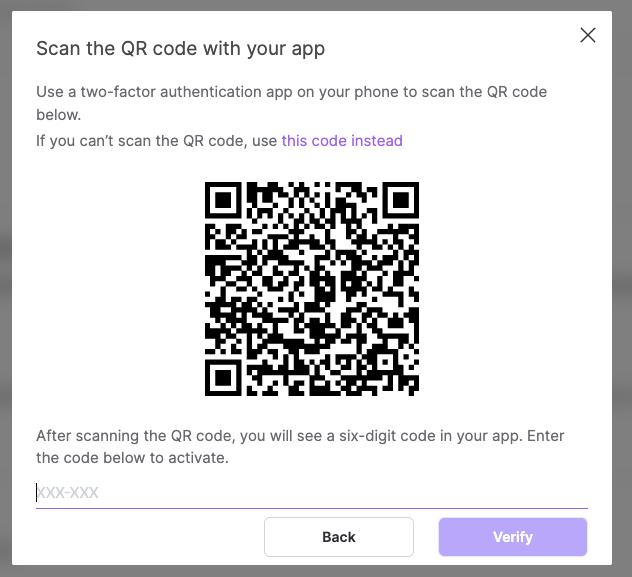
Once setup is done you should be able to click the icon you just selected and get a 6 digit code. Enter that 6 digit code into your browser where it says XXX-XXX and click verify.
Now you are done and 2FA is set up.